Modding Minecraft can be a lot of things: Your new hobby, a side-hustle or if you’re talented maybe even the start of a new business. Starting with Minecraft Modding can be a daunting task, but not with this STEP-BY-STEP introduction on how to start Modding Minecraft!
What you need
You should be able to install programs onto your Computer and you should have the basic computer to skills to know how to do it. For the Setup you will need a few things listed below:
- A Java JDK. I personally would recommend AdoptOpenJDK from here. But you are free to use any other JDK as well. However, make sure you use Java 8, other JDKs might not be supported perfectly!
- An IDE (Integrated Development Environment). I personally use IntelliJ IDEA for modding, the community version of which, you can download here. It is free and gives you all the amazing tools you need to start Modding in Minecraft.
- Java knowledge. Yes, this is NOT optional. You cannot start to mod Minecraft without at least some knowledge of Java. I might add a new post in the future, detailing what exact things you need to know, but you must at least know basics of OOP (Object Oriented Programming) and some knowledge of lambdas doesn’t hurt either.
- Forge. You can download forge here. Note that this description holds only for the 1.16 Versions of Minecraft. Make sure to download the MDK from the site. Choose the right download which is the recommended Version!
We will proceed with the basic setup for Forge to finally start modding Minecraft.
Minecraft Modding: Forge Setup
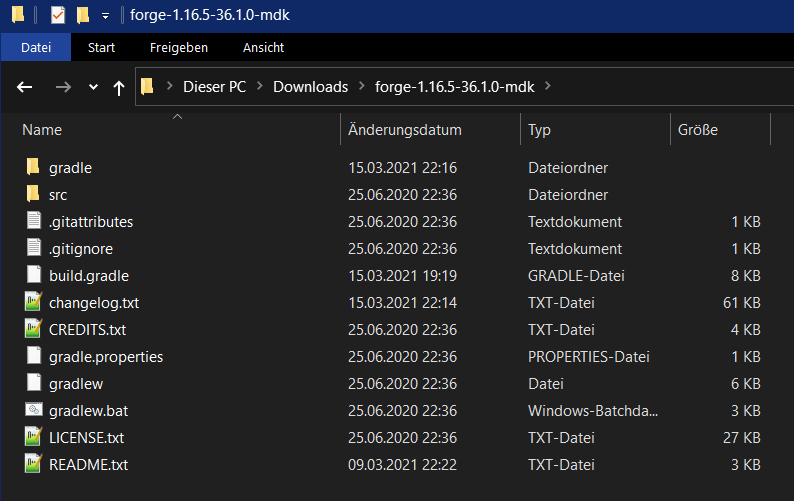
By this point you should have both a Java JDK installed and IntelliJ as an IDE. Firstly, when you download Forge you will have a .zip File inside your Downloads folder. Unpack it with a program such as WinRar of 7Zip. The contents of the folder seen below should be moved to somewhere, where you want your Mod Project to be created. And rename the folder the contents are to something of your choosing.
After moving the contents to your desired location, we can now start IntelliJ and import the project.
IntelliJ project Setup
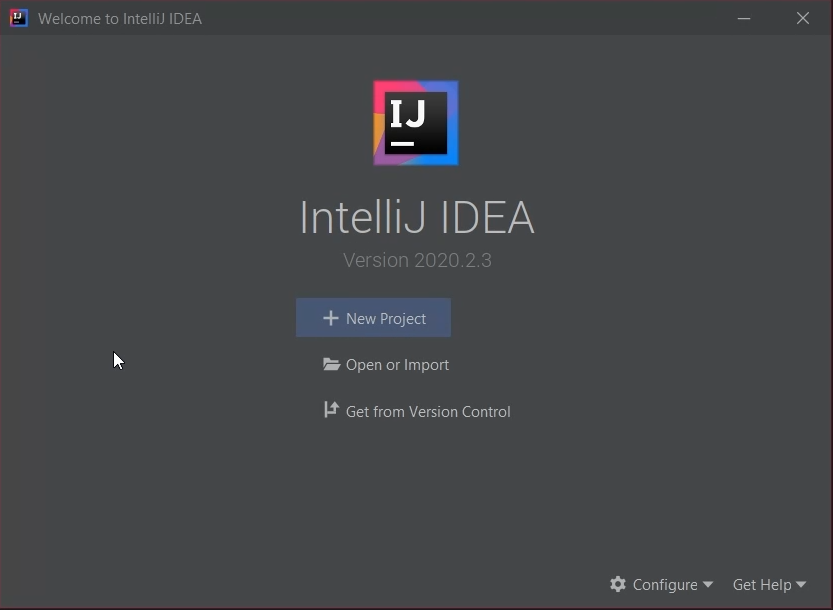
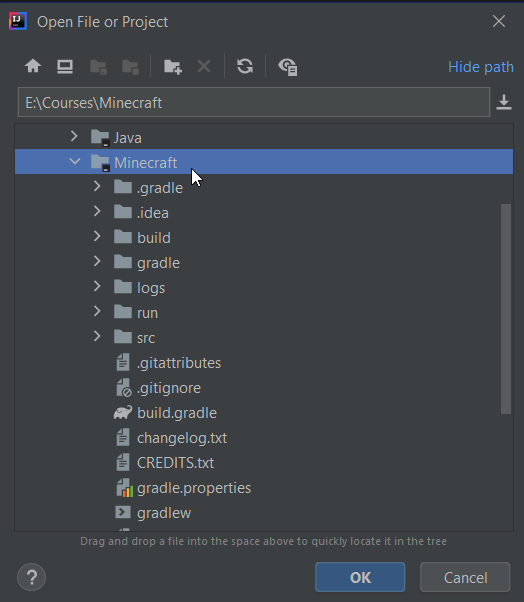
Upon opening IntelliJ for the first time a screen similar to this will appear. You want to choose Open or Import. A File Dialoge will open where you can choose the location of the existing project. Make sure to select the folder where the contents of the zip file are contained in like this.
Press OK. A new window will open a bunch of things will start happening. This might take quite a while. Please be patient and wait for a couple of minutes until either a BUILD SUCCESSFUL or BUILD FAILED is shown inside the build window. Most important is that after everything is done to the left of the window inside the Project window you see the colors of some of the folders change as well as a BUILD SUCESSFUL at the bottom inside the Build window.
Warnings as well as “Deprecated Gradle features” can be ignored. Only errors or a BUILD FAILED is cause for “concern” although those will most likely be fixable as well.
Changes to the build.gradle file
For the next step you will open the build.gradle file which contains crucial information about your mod as well as other things needed for the forge project.

version = '1.0'
group = 'com.yourname.modid'
archivesBaseName = 'modid'
Located on line 15, 16 and 17 respectively are the first important things to change.
version refers to the version of your Mod (NOT the Minecraft Version).
group refers to the name of your package which contains the mod. Think of it as a reverse of a domain com.google.modid would be for a Mod from google.com.
modid is very important and refers to a unique id with which your mod will be identified. For demonstration purposes we will change it to tutorialmod in this case!
I have changed the line accordingly:
version = '1.16.5-1.0'
group = 'net.tutorialsbykaupenjoe.tutorialmod'
archivesBaseName = 'tutorialmod'
Refrain from using the same group as me. Use com.yourname.tutorialmod. Otherwise people might not believe your work is actually yours!
We’re not done yet though. Press CTRL + R or CMD + R (on MAC) to open up the Replace menu. At the top of the file a replace menu you should open.

Put examplemod in the first line and tutorialmod in the second and click Replace all. You can then save the file by pressing CTRL + S. You should note that a little elephant appeared on the top right corner. Do not yet click it though.
Mappings
Mappings for Minecraft are a sort of way of translating the code – making it possible to read. You will most likely find these mappings here (found on line 34 of the build.gradle file):
mappings channel: 'official', version: '1.16.5'These are the official mapping used by the Minecraft developers themselves. You can use them, but I would personally advise to switch to the Forge mappings as I feel they are more intuitive when it comes to the names:
mappings channel: 'snapshot', version: '20210309-1.16.5'Note that if you choose not to change the mappings most other articles on the site as well as the video tutorials on YouTube might prove challenging to follow as the naming of fields and methods is going to be significantly different. Keep that in mind.
Changing the packages
Inside the Project window when you expand main > java you should the package default package structure with a class called ExampleMod at the end.
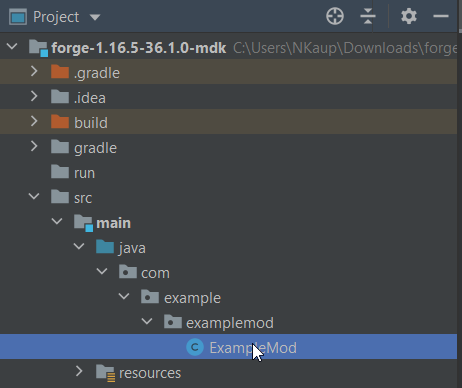
Open the class by double clicking. We’ll have to a change a few things here as well.
At the very top of the class you can see package: com.example.examplemod; this will need to be changed to our group name we have defined earlier. For me this will be net.tutorialsbykaupenjoe.tutorialmod
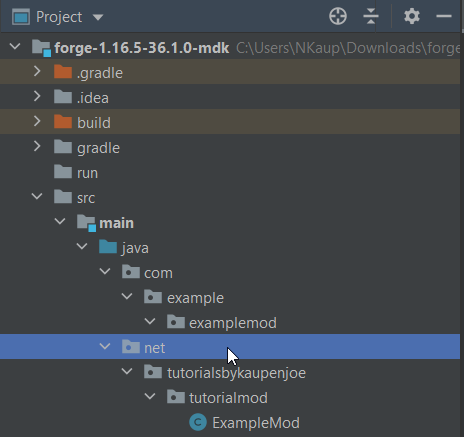
If you change it, a red underline will appear signifying an error. Right click on the line and chose “Show Context Actions” and then the first option with “Move”

Upon choosing this you should see a new package appear in your project window.
The other packages can now be deleted. Select the com package (or if your custom package started with com the example package) and hit the delete key. Confirm by pressing the Delete key and you should now be left with only your group packages and the ExampleMod class. This will now be renamed.
Right click the ExampleMod class and chose Refactor > Rename… and rename it to TutorialMod or if your Mod has a name then to that. Please be cognizant of Java Naming Conventions please! The name of this class should NEVER be the same as you mod id!
After renaming it, the last thing we will need to do is to make sure our Mod Id correctly used everywhere.
The Mod Id
It is important to note that the mod id must be written in lower-case with no spaces or special character expect for underscore or dashes. My recommendation is to choose something easy with words being separated by underscores. We will be using tutorialmod as the mod id.
Firstly you will see that above our TutorialMod class there is a @Mod(“examplemod”) that is first occurrence of the mod id inside of our code. To make our life in the future easier we will define a new string to reference instead of having to constantly write out the mod id. This will not be more useful in this tutorial, but will greatly reduce possible errors caused by misspelling out mod id.
@Mod(TutorialMod.MOD_ID)
public class TutorialMod
{
    public static final String MOD_ID = "tutorialmod";
This is the way we change the beginning. We add a static variable with our mod id and the replace the string inside the @Mod with the static call to that variable.
There is one more place where the mod id needs to be changed and the the setup will be complete. Inside the resources folder there is a META-INF folder which contains the mods.toml file. Open the file and look for modId=”examplemod” this will also need to be change to our mod id. In here we need to specify it ourselves.
# The modid of the mod
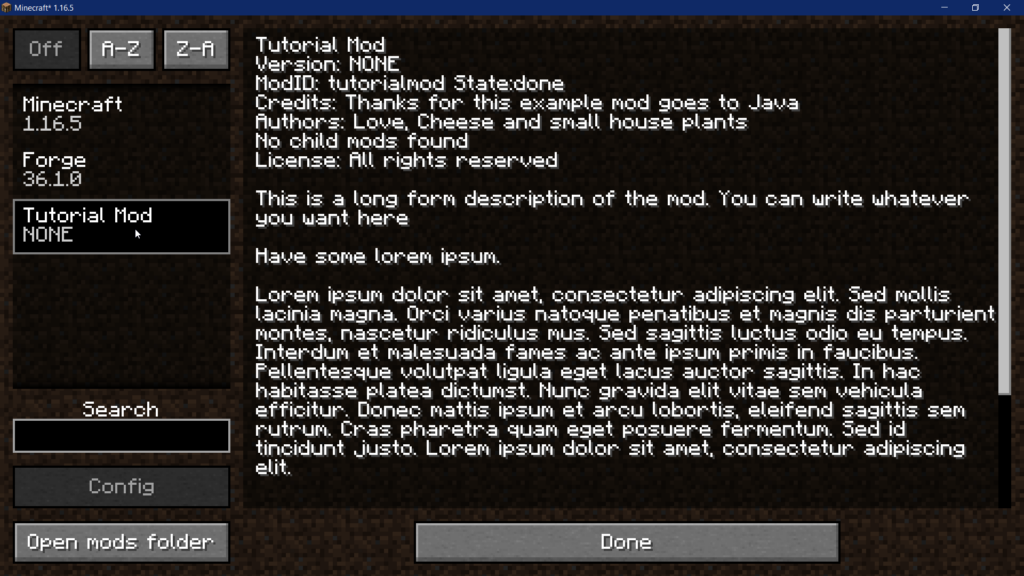
modId="tutorialmod" #mandatorythis is how it should look like! You can also change the displayName to something like Tutorial Mod
# A display name for the mod
displayName="Tutorial Mod" #mandatory
A quick list to verify where the Mod Id needs to be changed:
- build.gradle file (with the help of CTRL + R to replace all occurrences)
- TutorialMod class inside the @Mod
- mods.toml file
The final command
Now all you need to do is open the Terminal and type in this:
gradlew genIntellijRunshit enter and this will build and download some additional resources forge needs to function (Please note that if you are on Linux or Mac OS you need to use ./gradlew genIntellijRuns). You might get a BUILD FAILED. Simply run the command again. This might be everything you need to fix it.
After this point you can also hit the elephant at the top right corner. This will reload the gradle changes. And one error will pop up if you have chosen the forge mappings. Inside your TutorialMod file this line (53 probably) will have an error:
LOGGER.info("Got game settings {}", event.getMinecraftSupplier().get().options);Please simply delete the line as it is unimportant to us!
There might or might not be another error present inside the processIMC method, which looks like this:
// some example code to receive and process InterModComms from other mods
LOGGER.info("Got IMC {}", event.getIMCStream().
map(m->m.getMessageSupplier().get()).
collect(Collectors.toList()));
the getMessageSupplier() might be red. Simply delete the entire contents of the method until you are left with this:
private void processIMC(final InterModProcessEvent event) {

}
Finally starting Minecraft
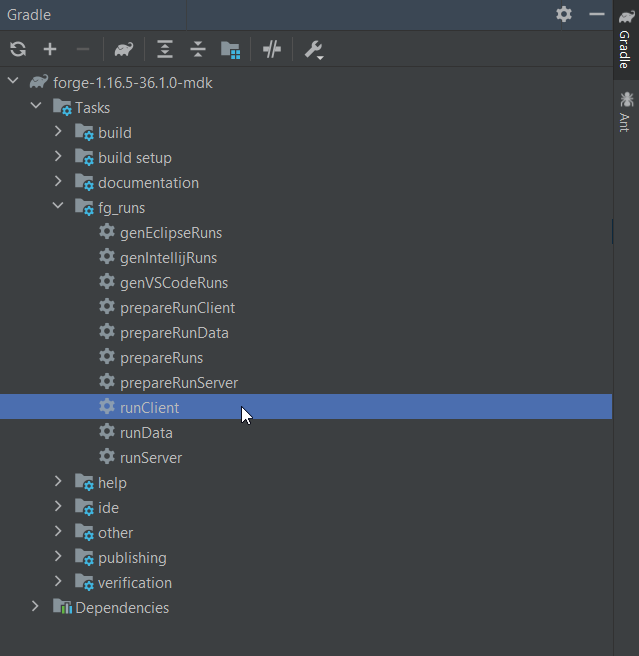
Navigate to the very top right corner to Gradle and expand the everything until you expand fg_runs double click runClient and Minecraft should start up.
Modding Minecraft Setup: COMPLETE
You can double check if your mod is inside the game by taking a look at the Mods:
Congratulations you have successfully started Modding in Minecraft. There is of course quite a bit more to it. But these were great first steps. If you found this useful I would appreciate checking out my YouTube Channel which has the exact same content (as well as other videos) just in video form.
If any questions remain please feel free to leave a comment on here or on YouTube 🙂
Was this helpful?
151 / 14
Finally a tutorial for version 1.16.5. Keep up the good work 🙂
Excellent tutorial! I’ve always preferred written tutorials rather than videos. Only hiccup I had was the error on line 53 didn’t come until after I tried to start Minecraft.