To add a new custom Block to Minecraft we have to add a few more things compared to adding an Item. But it’s still not too complicated, even for Beginners. Let’s Start!
Making the ModBlocks Class
Firstly we want to create a new package in tutorialmod called block and add a new Class to it called ModBlocks. This is where our custom blocks are going to be created.
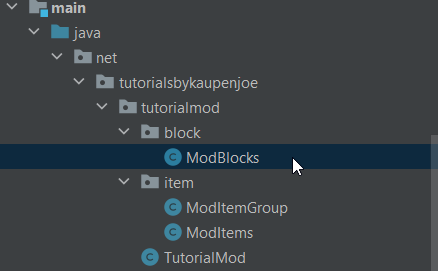
The first thing we’ll need is another DeferredRegister this time of type Block. So we need to put <Block> in the angle brackets!
    public static final DeferredRegister<Block> BLOCKS
            = DeferredRegister.create(ForgeRegistries.BLOCKS, TutorialMod.MOD_ID);
This is how the Creation looks.
Making sure you have the right Block package selected
IMPORTANT NOTE! Make sure you choose the correct Block package to import:
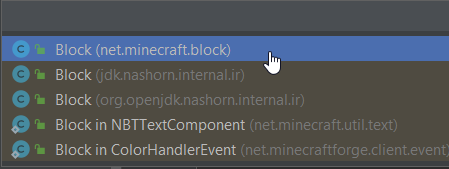
You have to choose net.minecraft.block. Do not choose jdk.nashorn.internal.ir. You will receive error and it won’t work. If you have added it by accident, you can change the import at the top of the file, simply remove import jdk.nashorn.internal.ir.Block;
Similar to our ModItems class we’ll need the register Method with the IEventBus paramter:
    public static void register(IEventBus eventBus) {
        BLOCKS.register(eventBus);
    }
Helper Methods
Instead of going straight into making the Block, we’ll first create two helper methods which will make our life’s easier and the code more understandable.
    private static <T extends Block>RegistryObject<T> registerBlock(String name, Supplier<T> block) {
        RegistryObject<T> toReturn = BLOCKS.register(name, block);
        registerBlockItem(name, toReturn);
        return toReturn;
    }
private static <T extends Block> void registerBlockItem(String name, RegistryObject<T> block) {
ModItems.ITEMS.register(name, () -> new BlockItem(block.get(),
new Item.Properties().group(ModItemGroup.TUTORIAL_GROUP)));
}As you can see from the code, the registerBlock method registers the block while the registerBlockItem method registers the associated Item. It’s important that we do it like this. We cannot just call BLOCKS.register for the new block, because we wouldn’t have an item associated with it then!
Creating the Custom Block
    public static final RegistryObject<Block> AMETHYST_ORE = registerBlock("amethyst_ore",
            () -> new Block(AbstractBlock.Properties.create(Material.ROCK)                   .harvestLevel(2).harvestTool(ToolType.PICKAXE).setRequiresTool().hardnessAndResistance(5f)));
Here we create the RegistryObject of type Block. The new Block we create requires Properties once again. We set the harvestLevel (controlling what tier can mine the block), the harvestTool (which controls what type of tool can mine the block) and very importantly .setRequresTool() which has to be called in order for the harvestLevel and the harvestTool to work! Finally we set the hardness and resistance. Basically how long the block needs to break and how resistant it is to explosions.
Finally, let’s not forget to add the register call to the TutorialMod constructor:
ModBlocks.register(eventBus);JSON Files
Blockstates JSON
{
    "variants": {
        "": { "model": "tutorialmod:block/amethyst_ore" }
    }
}
This is the easiest form of a blockstates JSON file. There are no particular variants. We’re going to see more complex Blockstates once we talk about Blockstate Properties.
en_us.json
"block.tutorialmod.amethyst_ore": "Amethyst Ore",The translation at this point should be self-explanatory!
Block Model JSON
{
  "parent": "block/cube_all",
  "textures": {
    "all": "tutorialmod:block/amethyst_ore"
  }
}
Here we see something new again. The parent is block/cube_all meaning all sides of the cube/block are the same textures, defined with the “all”. Once again that points to the block folder inside the textures folder and looks for an amethyst_ore.png in there.
Item Model JSON
The item model JSON is really easy as it only points to the Block Model JSON, having the same texture and block-like representation inside the inventory:
{
  "parent": "tutorialmod:block/amethyst_ore"
}
Don’t forget the texture!
Finally also add the texture into the textures > block folder. The texture (and all other files) can be downloaded at the bottom of the article.
It works!
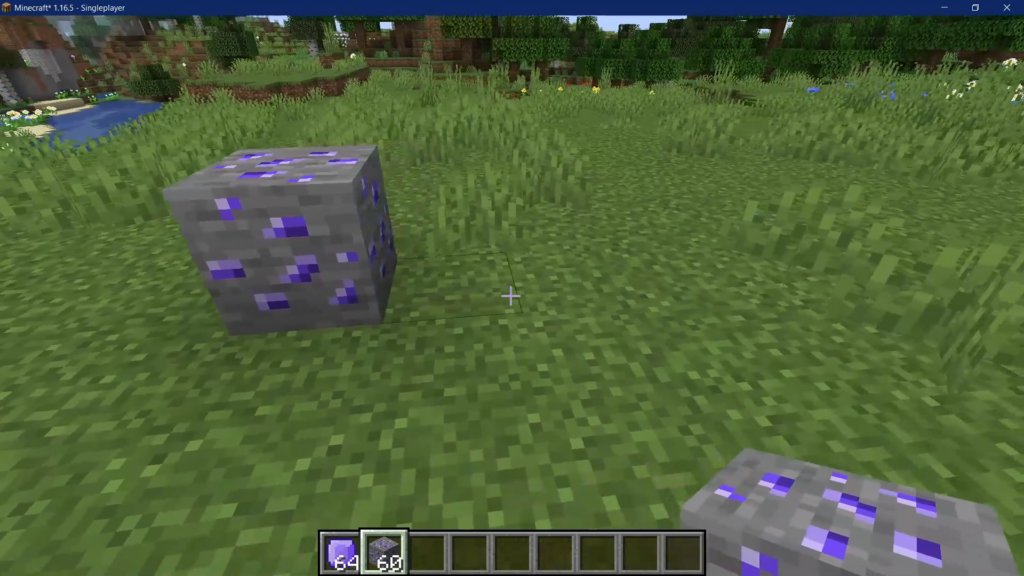
However, when mining our custom block, it does not drop anything yet? Don’t worry that’s correct, we’ll also have to add a loot table.
Loot Table
Loot tables are more complex than the other JSON files we’ve seen so far. I’d advise to take a look at this wiki article on the Minecraft fandom wiki.
The files goes into data > tutorialmod > loot_tables > blocks > amethyst_ore.json:
{
  "type": "minecraft:block",
  "pools": [
    {
      "rolls": 1,
      "entries": [
        {
          "type": "minecraft:item",
          "name": "tutorialmod:amethyst"
        }
      ]
    }
  ]
}
You don’t need to necessarily understand everything in this code, the main thing is that the type is a block (which should make sense, we’re defining the drop for a block) and inside the entries we define the item that drops. In this example we drop the amethyst we’ve created before. But you can also replace it with "name": "tutorialmod:amethyst_ore" and then the block will drop.
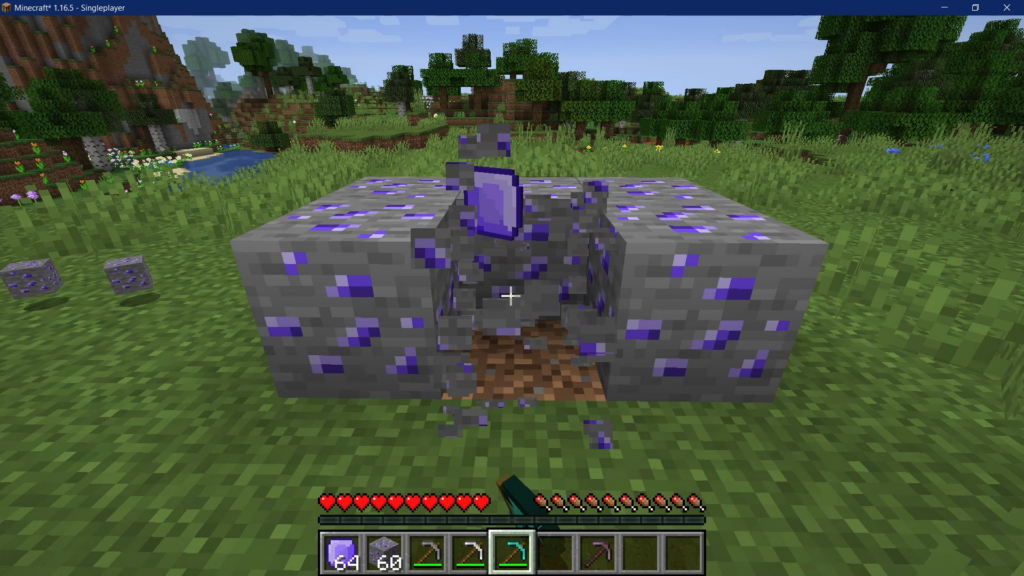
Like in the image above, it should work with a diamond and iron pickaxe, but not with the stone pickaxe as we have set the harvest level to 2.
Common Issues and Mistakes
My Custom Block is pink and black when I place it down?
If that is the case, the issue is either in your blockstates JSON or in your block models JSON. Please make sure the contents are correct and the directory as well as the file names are all written without typos!
My Custom Block is pink and black in my Inventory?
If that is the case, the issue is item model JSON. Please make sure the contents are correct and the directory as well as the file names are all written without typos!
My Custom Block is not in the Creative Menu?
Please check your TutorialMod constructor and make sure you have added the ModBlocks.register method after the ModItems.register method!
My Custom Block still doesn’t drop anything after adding the loot table?
Make sure you are out of creative mode! The block will only drop something in survival. Try to use the iron pickaxe, if it still does not work, make sure you have added the required Block properties. Next check the loot table you have added and make sure it is in the right folder and there are no typos!
Assets for Download
GitHub Repo: https://github.com/Tutorials-By-Kaupenjoe/Minecraft-1.16.5/tree/5-newBlock
All Changes as Gists: https://url.kaupenjoe.net/yt8/gist
amethyst_ore.png: https://url.kaupenjoe.net/yt8/textures
All Assets zipped: https://url.kaupenjoe.net/yt8/assets
Was this helpful?
17 / 2
[…] You can make a new block and add custom recipes to it, if you want to try it out. Check out the article on making a block, if you need a refresher. The textures and files you would need are also available for download at […]